Creating your First Instance
If you haven’t done so already, go ahead and click on the allocation card you want to use. For this tutorial we will use a Jetstream2 Trial Allocation, but the steps here can be applied to any allocation with credits exchanged for the standard Jetstream2 compute resource.
Navigating the User Interface
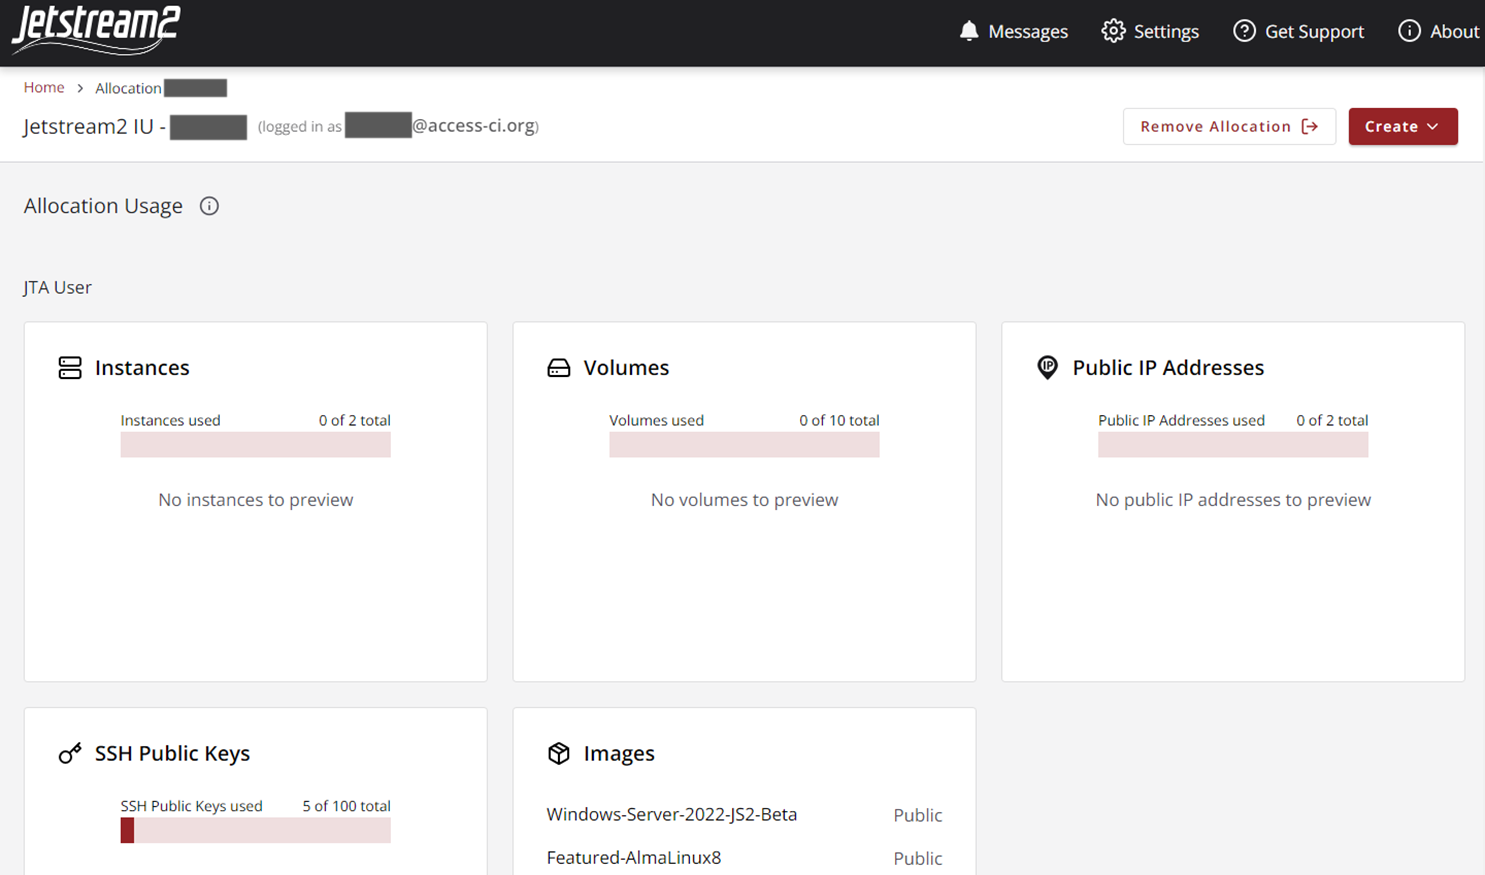
You should be presented with an overview page with several cards indicating instances, volumes, Public IP Addresses, etc. If you are using a brand new allocation, most of these cards will be empty. Go ahead and click around to familiarize yourself with the UI.
If you want to return back to the allocation overview page, simply click on your allocation in the nav bar.

Creating an Instance
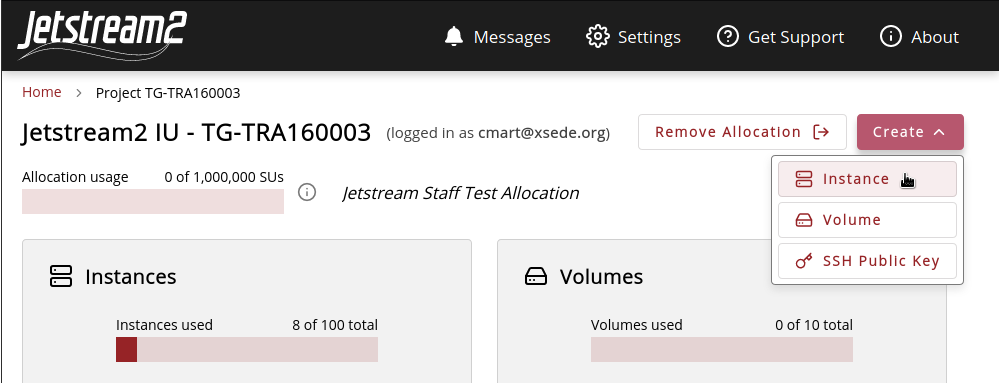
When you are ready, let’s move on to creating your first instance. An instance is essentially an entire computer that exists virtually in “the cloud”, meaning you can only interact with it over the internet. Just like if you were to go shopping for a new computer, when you create an instance you can choose the operating system and how powerful you want the instance to be.
To begin, click on the Create button in the top right and select Instance.
Choosing a Source/Image
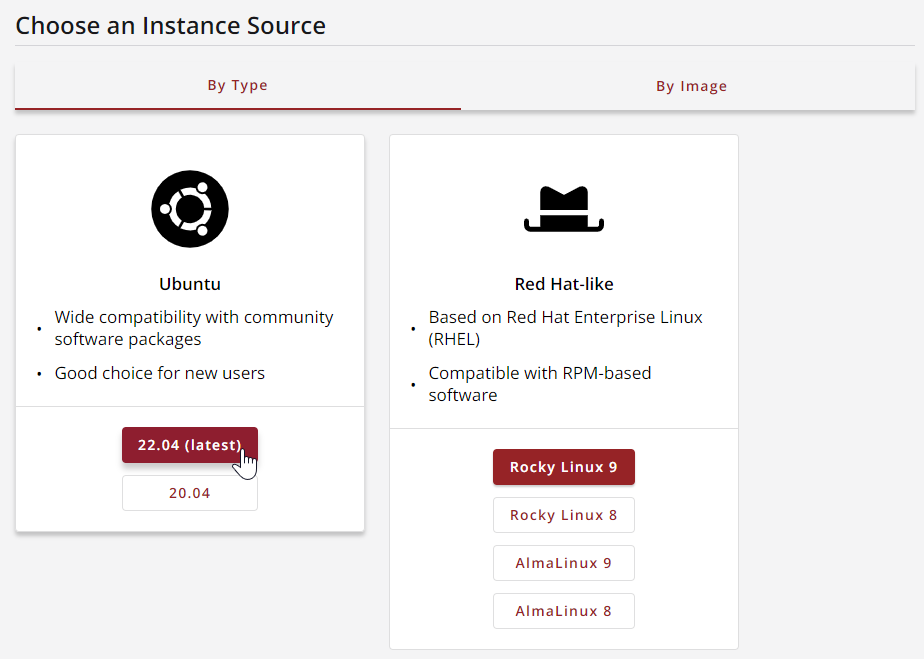
Next you get to choose the instance ‘source’, or image. An image is essentially just a copy of an instance which includes the operating system and every installed software package. Images can be used as the base for future instances so you don’t have to reinstall everything whenever you want a new instance. Jetstream2 staff maintains and distributes several featured images that include a few popular Linux operating systems and some basic software packages.
For now, ensure you have By Type selected in the top bar and choose Ubuntu 22.04. This is by far our most popular featured image.
Give your Instance a Name
We recommend giving your instance a unique and descriptive name so that you or others will have some idea of what the instance is for at a later date. Alternatively, if you are just testing things out and plan to delete the instance later, we offer a button to generate a randomized name.
Go ahead and give your instance a unique name now.

Choose a Flavor
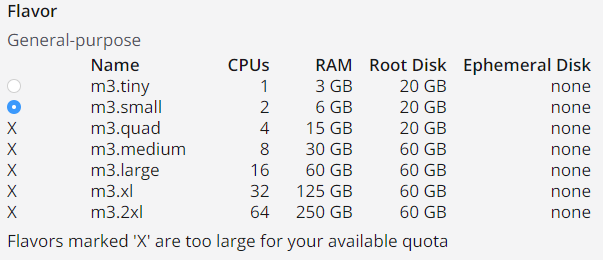
The flavor determines the CPU count, the RAM available, and the size of the root disk. If you are using a Jetstream2 trial allocation, the maximum size available to you is an m3.small. For a complete list of sizes, see Instance Flavors.
For the purpose of this tutorial, an m3.small is more than enough, so choose that.
Choose a Root Disk Size
We recommend you keep the default size selected here as this will not count against your total storage quota. If you need more space, you can always attach a volume for more space later. Also note that larger flavors have 60 GB of root disk instead of 20 GB.
Leave as default (20 GB)
How Many Instances
Leave this at 1
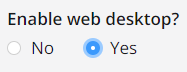
Enable Web Desktop
Select Yes to enable the Web Desktop. We will be using the Web Desktop later in this tutorial, so make sure to enable it here.
Choose an SSH Public Key
Leave as None for now.
Create
Don’t worry about Advanced Options. Go ahead and scroll all the way down and select Create to start building your instance.
Info
If you are interested in learning more about the options presented here, see Creating an Instance with Exosphere.
Explore the Interface
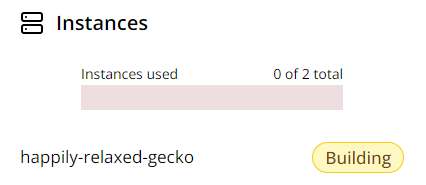
Instances can take several minutes to build. After creating your instance you should be sent back to the home screen, where you should see the instance you just created with a Building sticker.
Instance Details Page
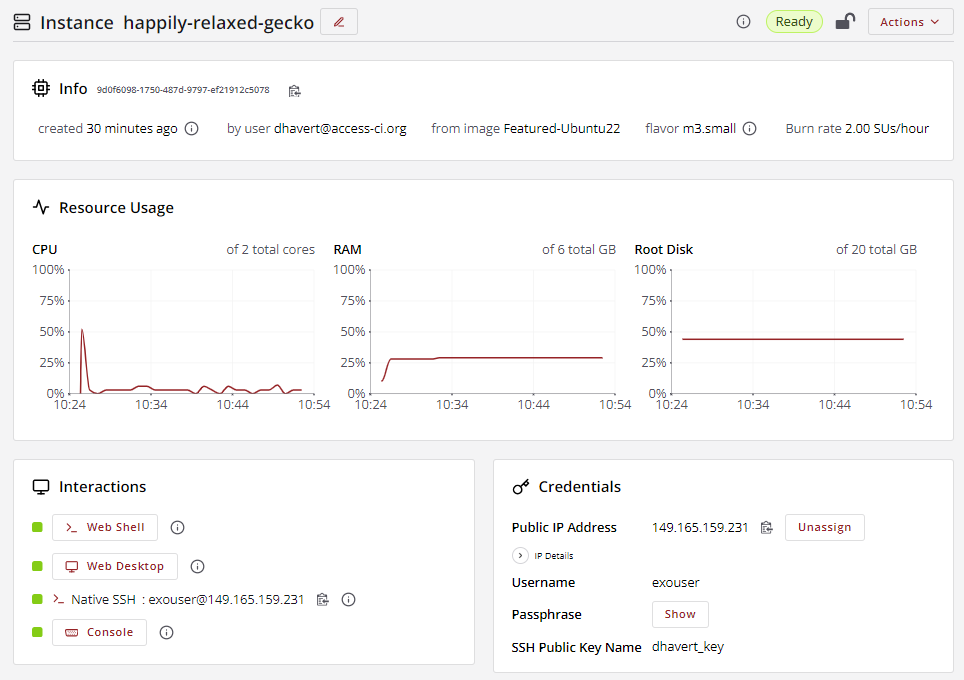
Take this time while your instance is building to explore the interface again. See if you can navigate to the instance details page, which looks like the following:
From the Home Page, you can navigate to an instance’s details page by clicking on the Instances card, then clicking on the name of the instance you want to inspect.
Instance Ready
When the instance is ready, you will see the status sticker in the top right of the instance details page change from a yellow Building sticker to a green Ready sticker.

What if the sticker changes to Error?
What if the status sticker for your instance changes to a red Error sticker instead?
Sometimes an instance will fail to initialize. There are any number of reasons this can occur. Don’t worry though. The instance you created is brand new, so there is no harm in deleting it. The good news is that creating a new instance is incredibly easy, as you just learned.
If your instance Errors out, delete it and make a new one
-
You can delete an instance by selecting Actions (next to the status sticker), then select
Delete. -
Then create a new instance by repeating the steps in this guide
Next
Once you have an instance that is Ready, it’s time to start interacting with it. Proceed to Accessing Your Instance