DNS Records in Horizon
DNS Zones
A DNS zone should automatically be created for your project with format PROJECT.projects.jetstream-cloud.org.
If you click on the zone name, then open up the “Record Sets” tab, you should see a list of records for your project’s DNS zone. On a new project with no instances, you should see the following records:
- SOA - Start of authority record
- NS - Name server
Manually Creating an A Record
Every time you create or unshelve an instance, the instance should automatically receive a public IP and automatically generate an A record.
If your instance fails to automatically receive an A record, you can use these steps to manually create and assign an A record to your instance.
- Take note of the name of your instance as you will need this information later.
- Ensure your instance has a public IP. This will be of form
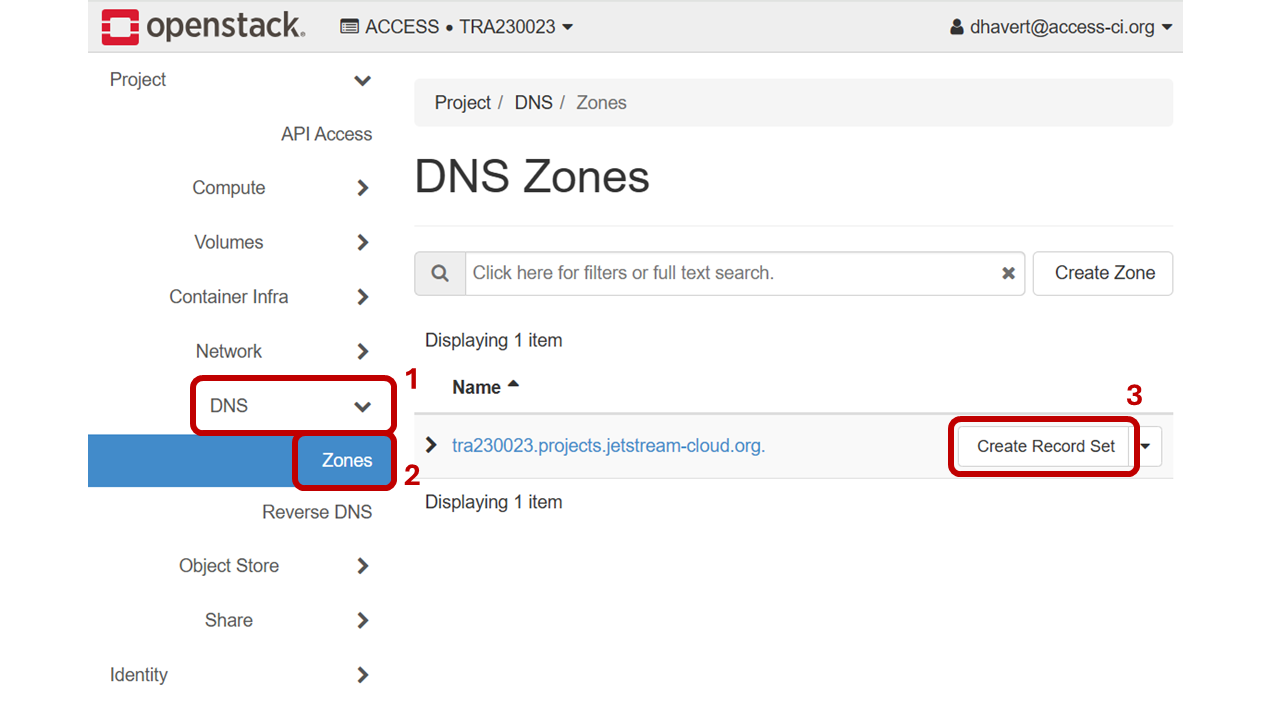
149.156.x.x. Make note of this IP for later. - In the Horizon interface, navigate to DNS -> Zones using the navigation bar on the left.
- Pick which DNS Zone you would like to use (most projects will only have one DNS zone). To the right of the name, click “Create Record Set”.
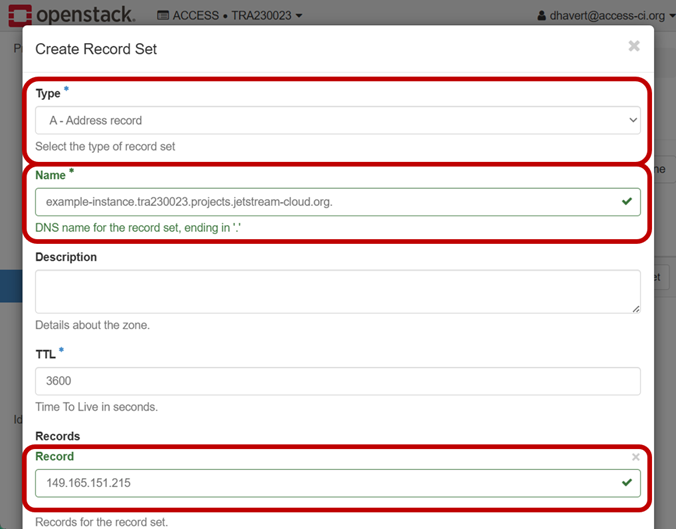
- In the Create Record Set page, fill in the following details:
- Type:
A - Address Record - Name:
instance-name.project-code.projects.jetstream-cloud.org.- where
instance-nameshould be the name of the instance in all lowercase and with underscores and spaces converted to dashes (e.g. for instance with name2VERTically-deciding_Jay 2you would enter2vertically-deciding-jay-2) - where
project-codeis the code assigned to your allocation/project in all lowercase (For projectTRA160003you would entertra160003) - where the entire string ends in a period.
- where
- Record: Public IP Address currently assigned to the instance (of form
149.156.x.x). - Leave all other entries with default values.
- Finally, scroll down and click Submit to finalize the creation of the A record.
September 26, 2025
September 26, 2025