Tutorial Cleanup and Next Steps
Cleanup
You are nearing the end of the getting started tutorial. To ensure you don’t keep burning credits after completing the tutorial, let’s clean up everything we’ve just done. This means we will need to remove all volumes, instances, and images we created during this tutorial. Follow these steps in order:
- Detaching all volumes
- Can be done from the Volume List page (Click on the Volumes card from the Allocation Overview page)
- Deleting all volumes
- Can also be done from the Volume List page
- Deleting all instance
- Can be done from the Instance List page
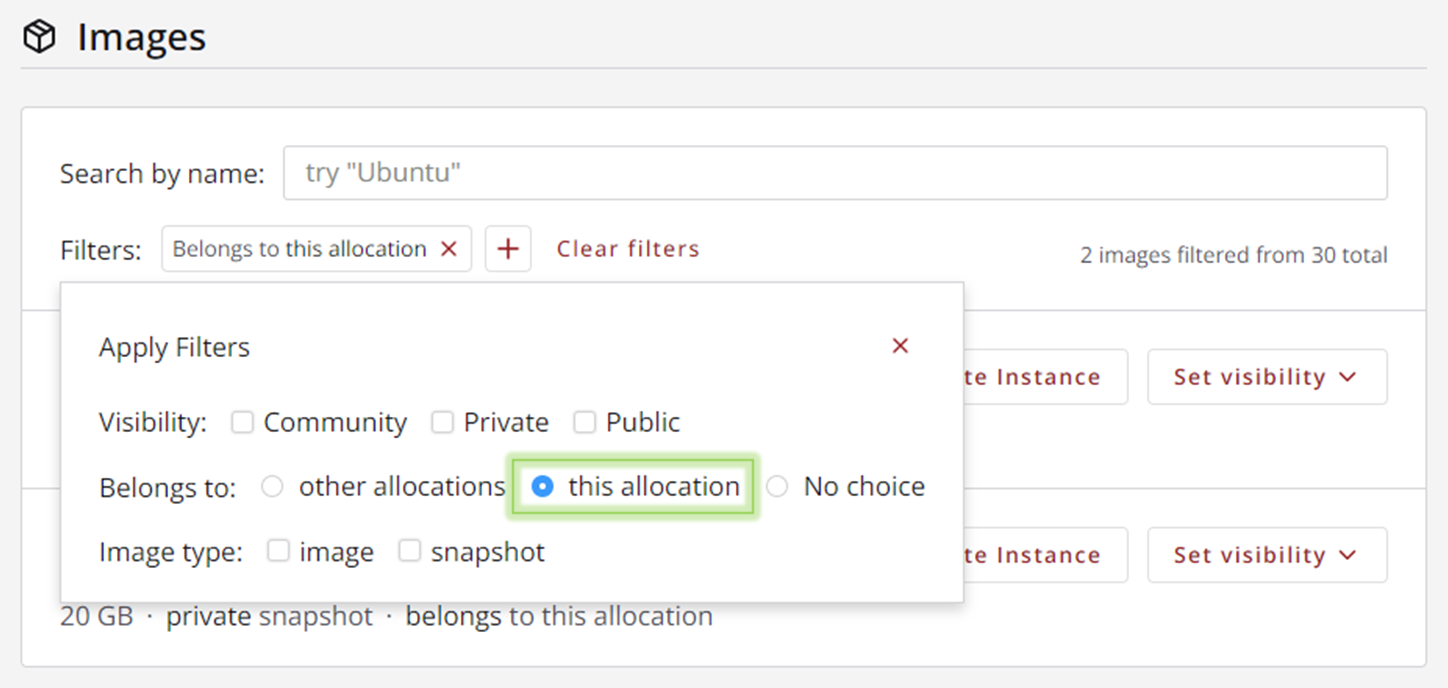
- Deleting any images you created
- Can be done from the Image List page. Filter by images belonging to ‘this allocation’
Next Steps
Congratulations! You have reached the end of the getting started tutorial. You now know how to use Exosphere, our most user-friendly interface, to create and manage instances, volumes, and images. These are the fundamentals of using cloud infrastructure.
Get an ACCESS allocation
If you are ready to get access to all of Jetstream2’s features, you should begin the process of getting your own ACCESS allocation. See ACCESS Overview for guidance.
Start Using Jetstream2
The best way to learn is by using. If you plan to use Jetstream2 to run your own virtual workstations, then you have all the tools you should need to create your instance, install and run your software, and conserve your SUs.
Advanced Topics
Whether you want to use Jetstream2 to set up your own scaling infrastructure with Terraform, create a Science Gateway to provide for your community, or simply setup a simple static web server, we have a number of guides for getting started with these resources. Depending on what you plan to do, you may have to use one of our other interfaces.