Launching an instance
- Open
Launch instancemenu
- With the
network,security group, andssh keyssetup, you should be ready to launch an instance. - On the left side bar, click on
Project→Compute→Instances - Click
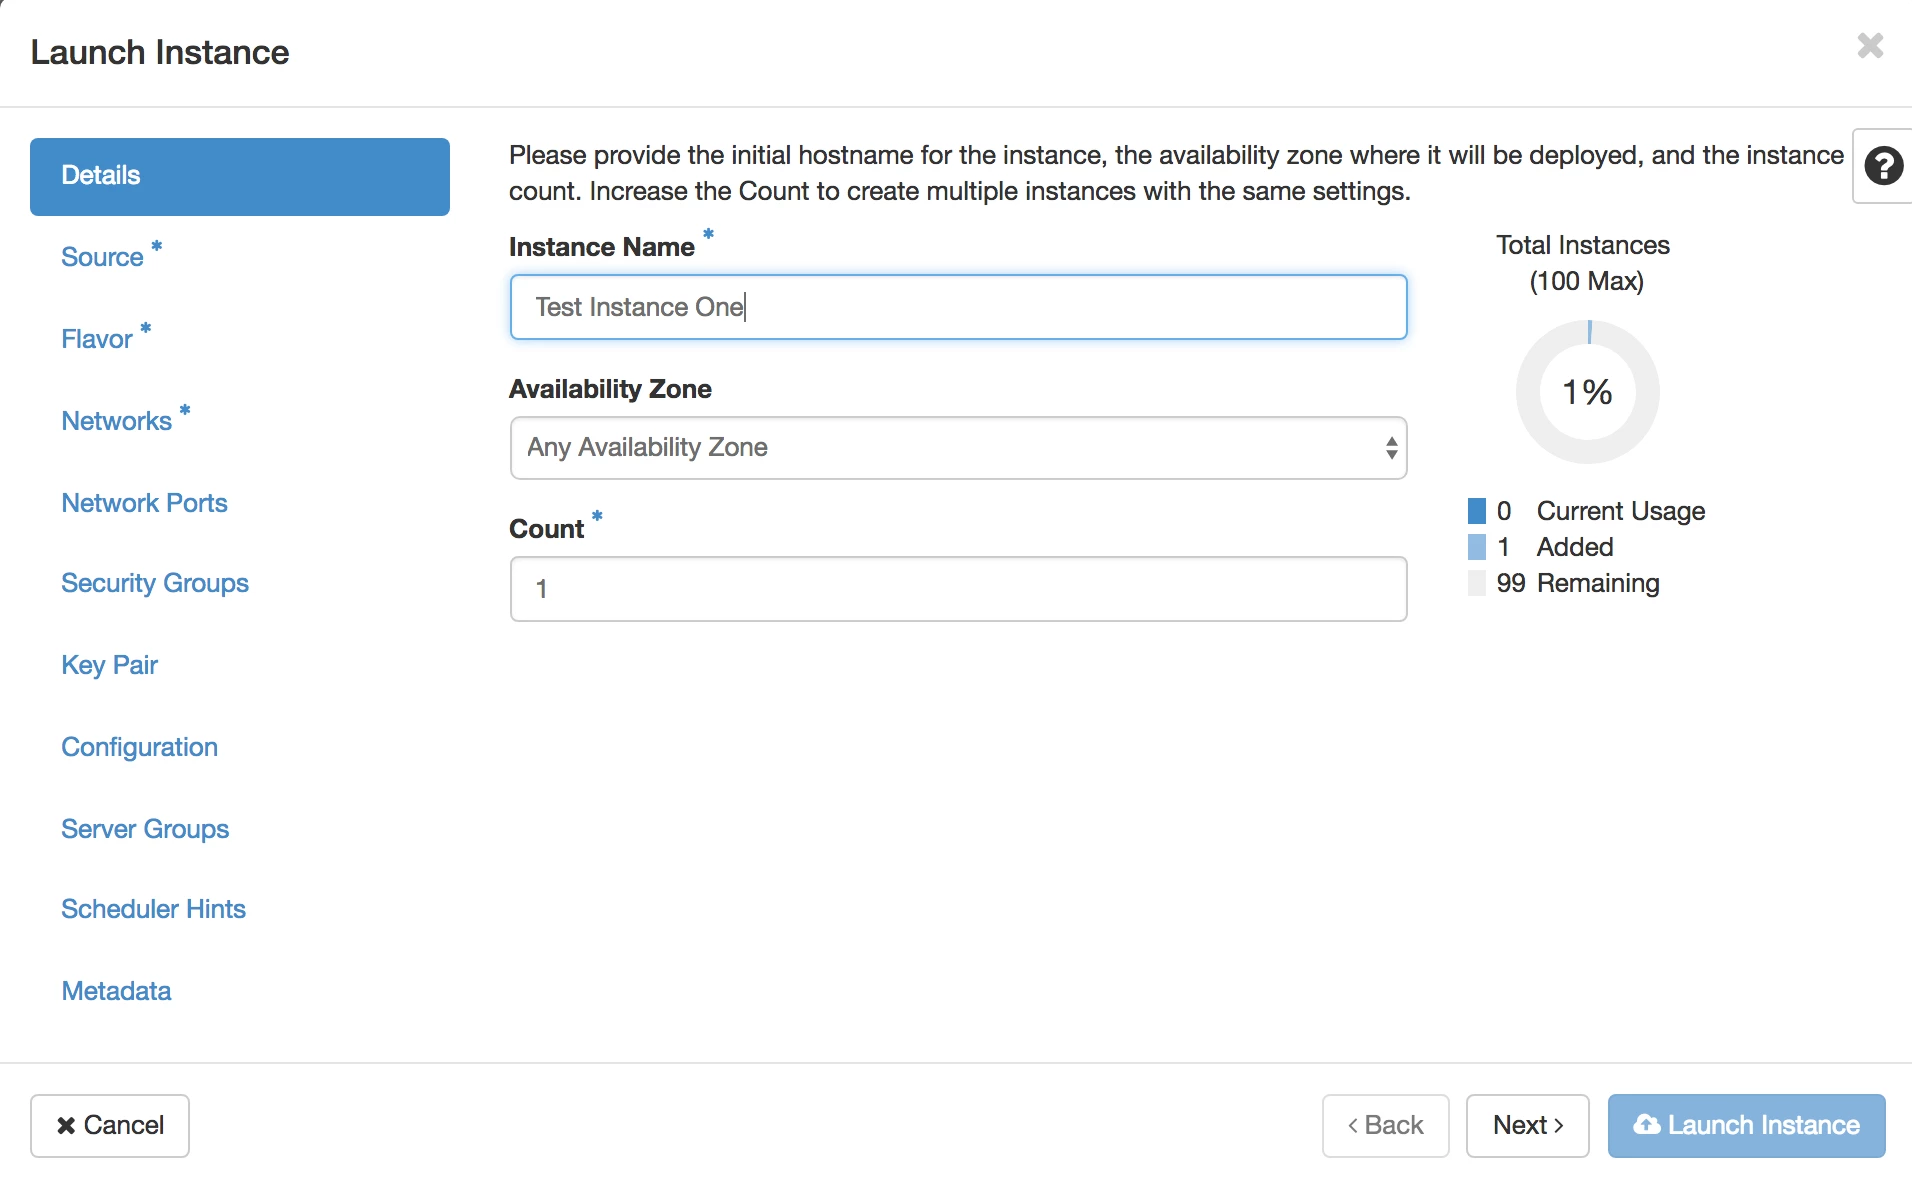
Launch Instance - Give your instance a descriptive name. You can take the defaults for the rest of the items.
- Click
Next.
- Instance Source
-
On the
Sourcescreen, make sure theSelect Boot Sourceoption isImagePlease note that it may take several seconds for all the image options to appear and to fully populate that list as horizon pulls the entire image catalog listing over again each time!
-
Type
Featuredin theAvailablebox to find the Jetstream Featured images. You can also boot any ofcommunityorpublicvisibility images shown in the list if you’d rather do that, but Jetstream staff have only tested or will support the featured images. - Find the image you want to use and click the arrow to the right of its name. You’ll see it show up under
Allocatedtowards the top of the dialog box. -
Click
Next.Image Visbility
If you are deploying a non-public image that has been shared to your project from another project, you will need to choose the correct VISIBILITY filter option in the dropdown menu as the list defaults to only public or your own private images.

ALTERNATIVE: Volume-backed Instance
- Some users may find the pre-defined default ephemeral-storage-based root disks do not provide sufficient flexibility.
- For these cases, users may create a custom-sized volume from which to boot.
- ADVANTAGES: volume-backed instances allow users to create any size root disk for an instance that they need (limited only by ext4 or xfs filesystem limits). Additionally, actions such as shelving and unshelving happen VERY quickly relative to fixed ephemeral root disks.
- DISADVANTAGES: –> Volume-backed instances count against the project’s storage quota. <–
- As above:
- On the
Sourcescreen, make sure theSelect Boot Sourceoption isImage - Type
Featuredin theAvailablebox to find the Jetstream Featured images. - Find the image you want to use and click the arrow to the right of its name. You’ll see it show up under
Allocatedtowards the top of the dialog box.
- On the
-
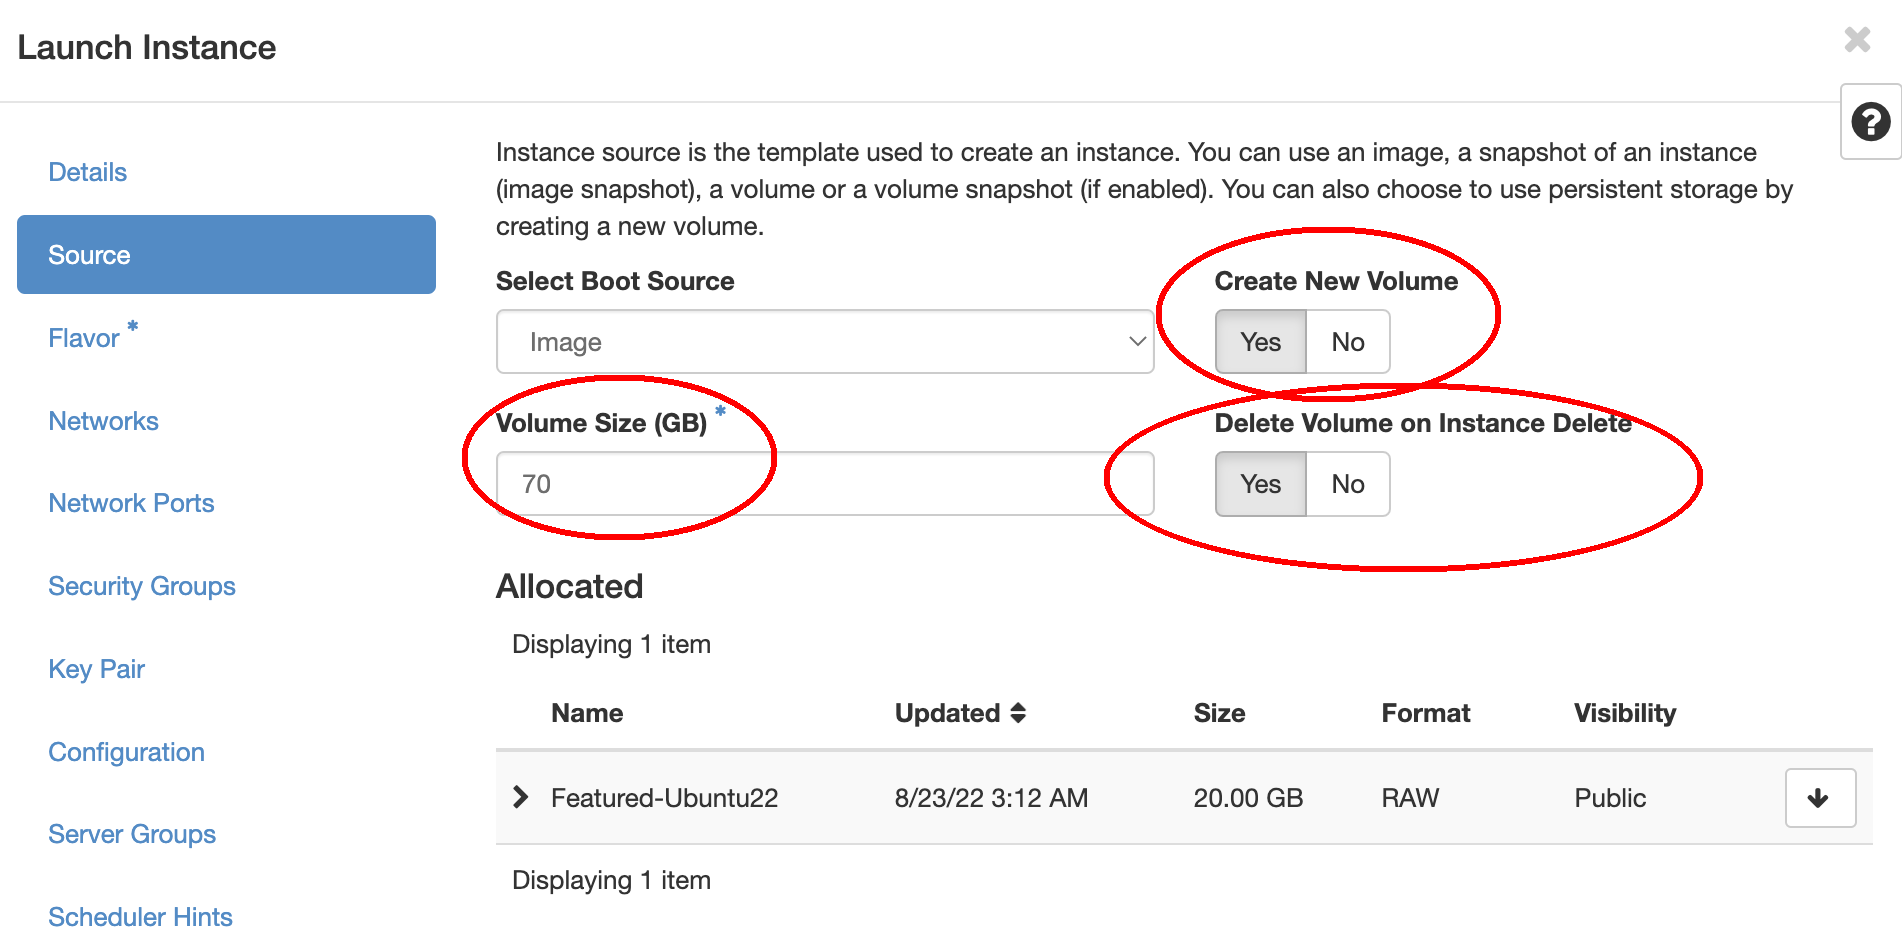
NEW: Change
Create New Volumeto Yes- The setting for
Delete Volume on Instance Deletecan be set to Yes or No. We recommend Yes.
- The setting for
-
Click
Next.
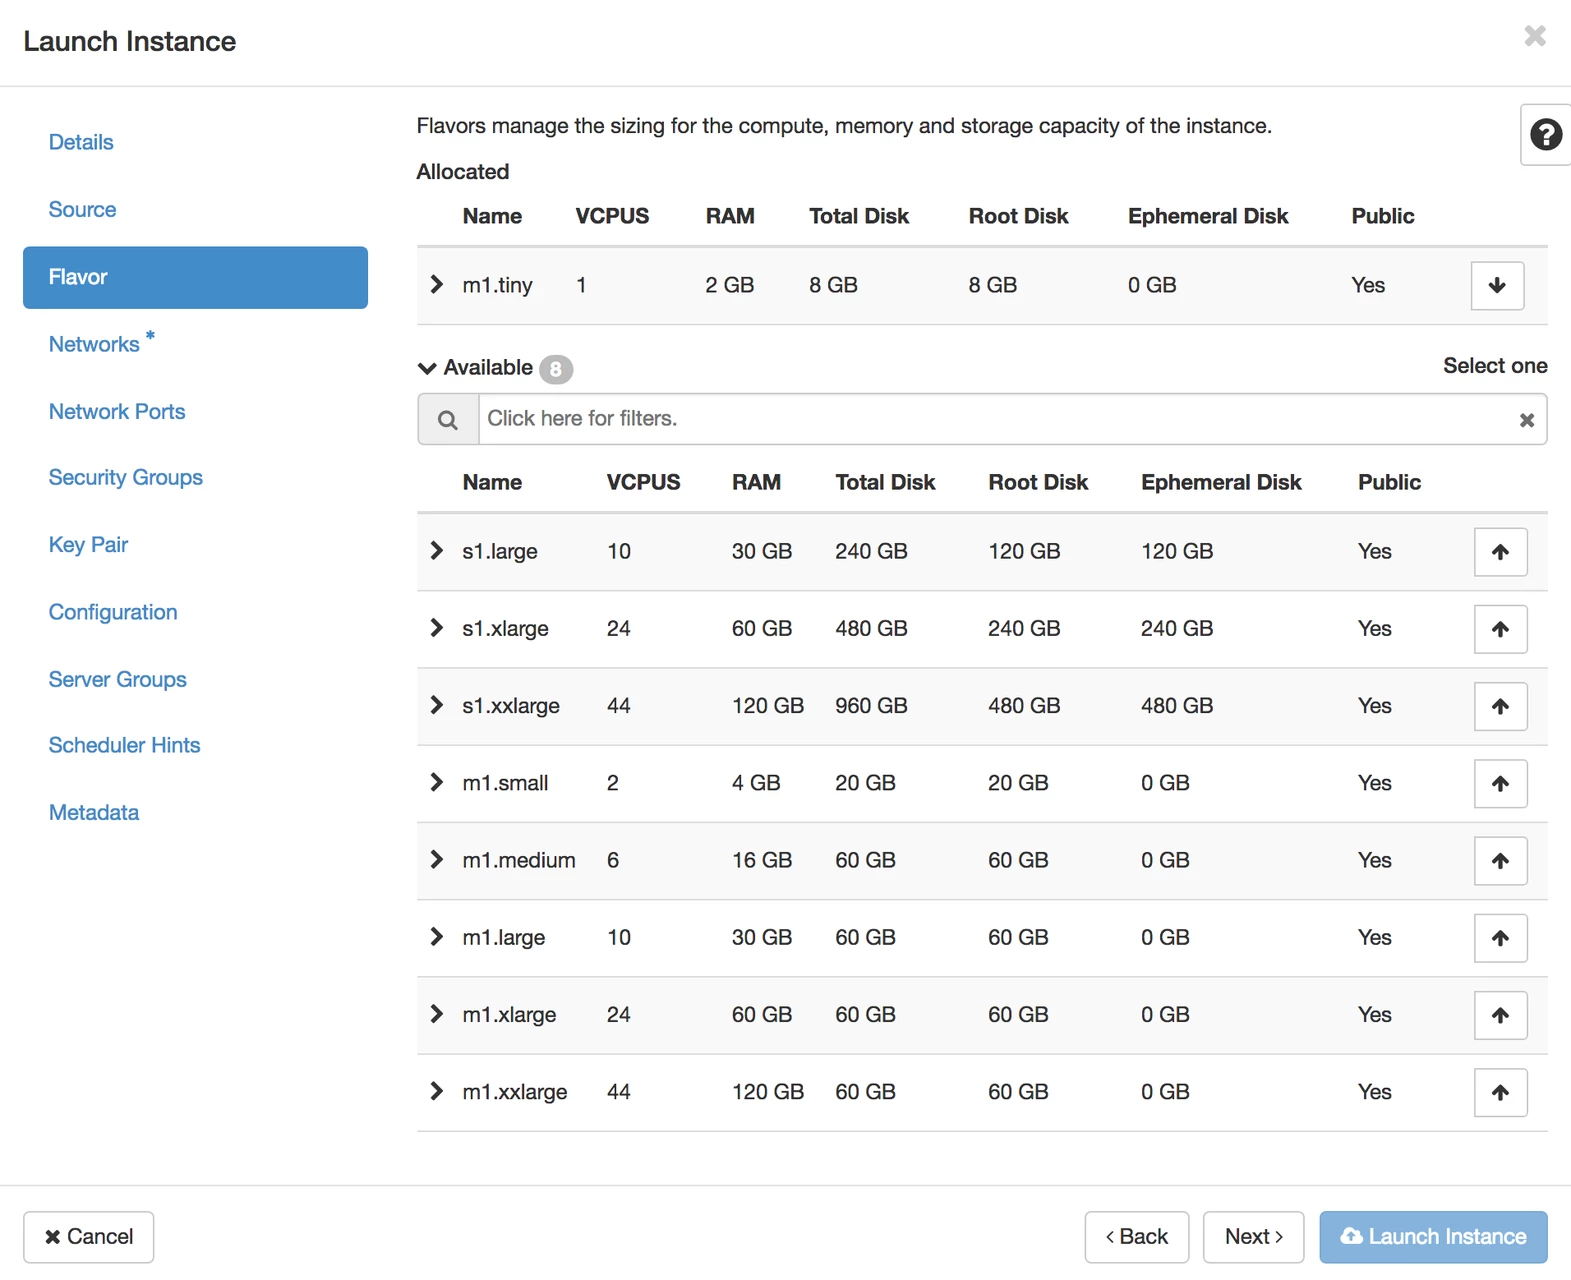
- Flavor
- On the
Flavorscreen, select the size VM you want to use and click the arrow to the right of its description.Like the previous screen, you’ll see it move up into theAllocatedarea towards the top of the box. -
Click
Next.Flavor Compatibility
Please choose a
flavorcompatible with the selected image size and resource requirements.
- Networks
- On the
Networksscreen, find the network you created earlier and click the arrow to the right of its description. Like the previous screen, you’ll see it move up into theAllocatedarea towards the top of the box. - Click
Next. - Click
Nextagain to skip theNetwork Portsscreen and proceed toSecurity Groups

- Security Groups
- On the
Security Groupsscreen, select the one or more of the security groups you created earlier and click the arrow to the right of its description. Like the previous screen, you’ll see it move up into theAllocatedarea towards the top of the box. - Click
Next.

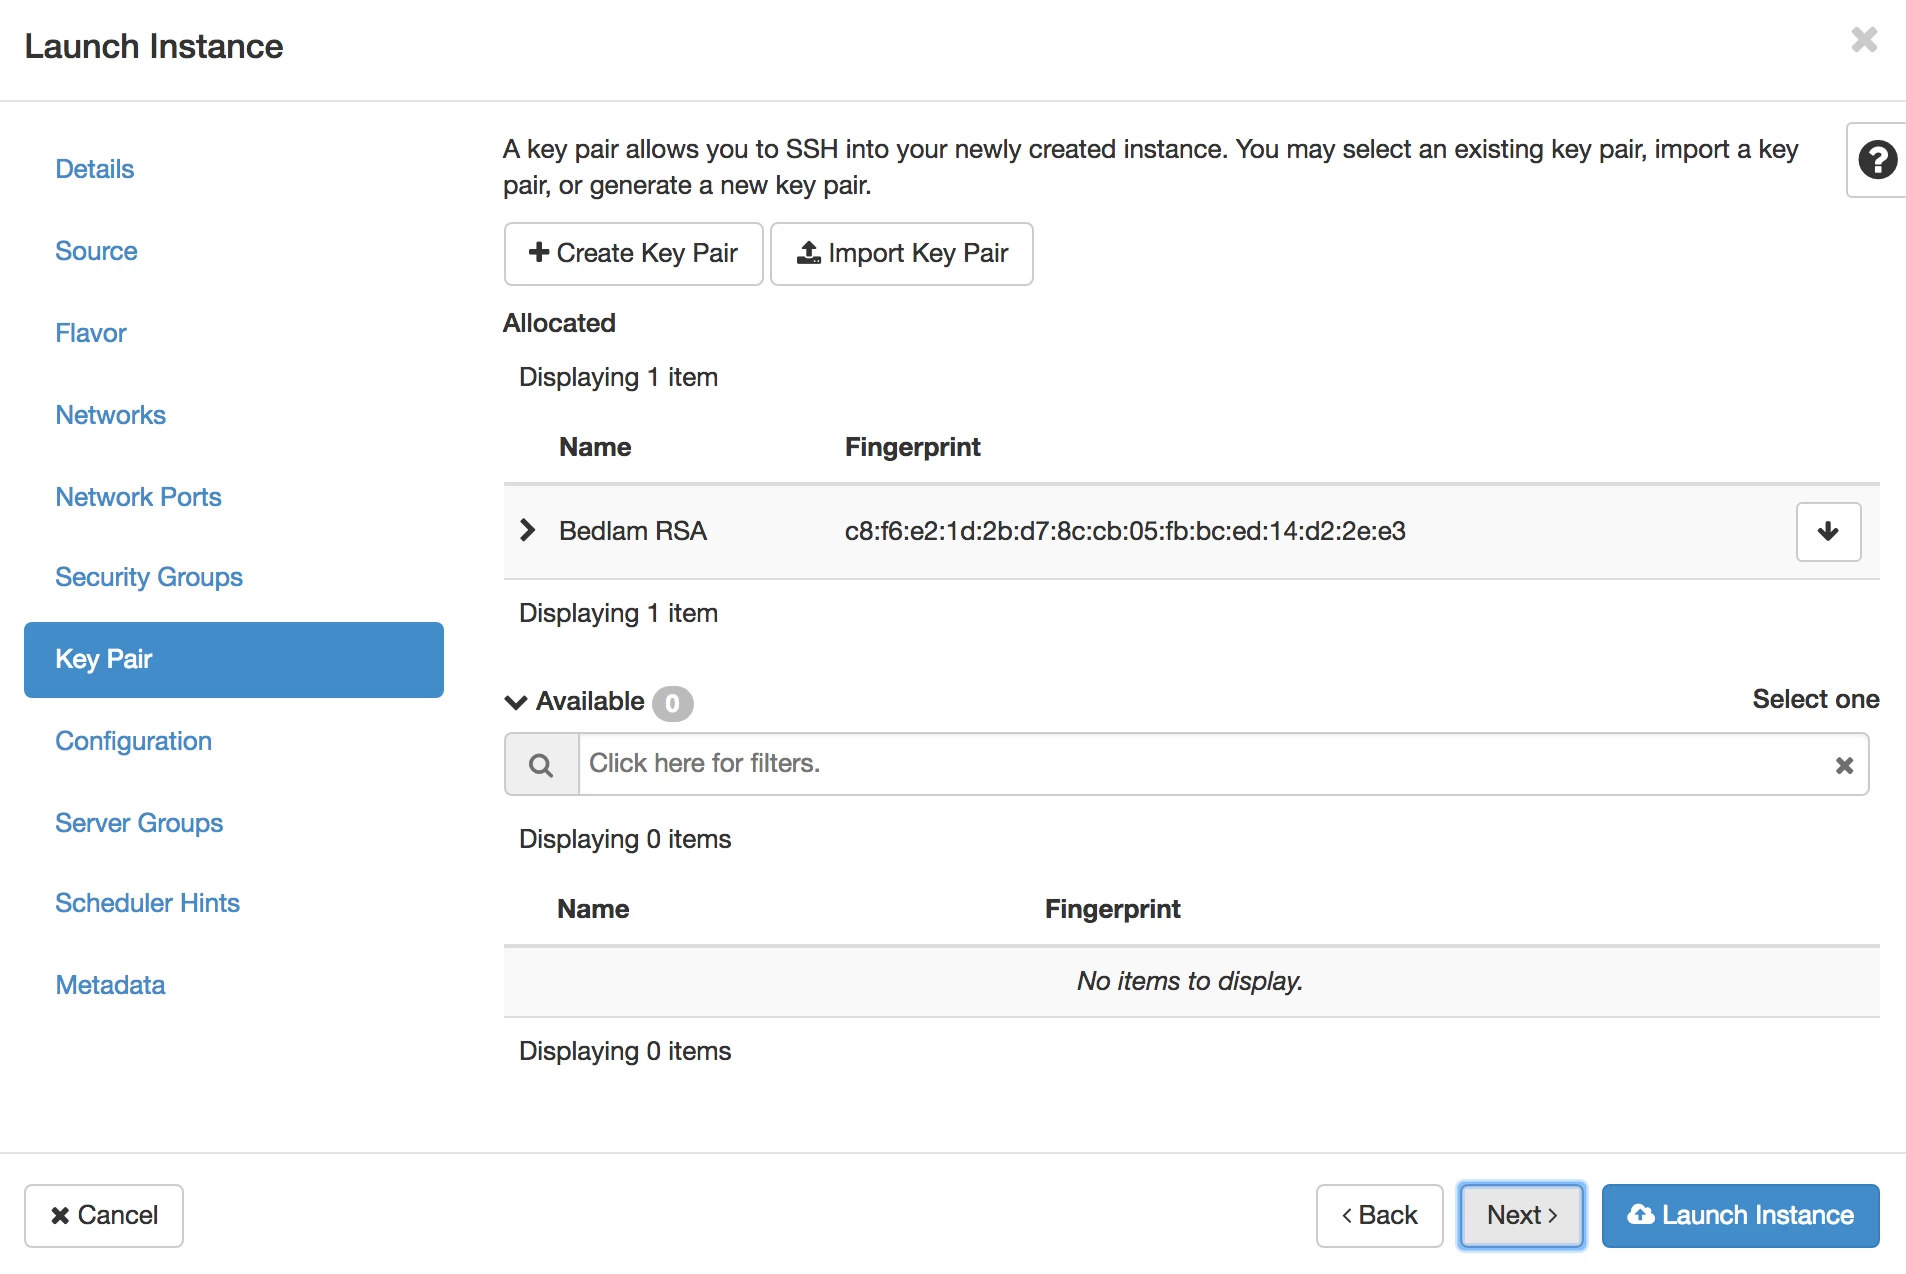
- Keypair
- On the
Key Pairscreen, if the key pair you created earlier is NOT in theAllocatedsection, click the arrow to the right of its description. Like the previous screen, you’ll see it move up into theAllocatedarea towards the top of the box. - At this point you can click
Launch Instanceto deploy your instance.
- Associate Floating IP
- Your instance should now show up in your instances list.
- Once it has entered the running state, click the
Actiondropdown at the far right and selectAssociate Floating IP

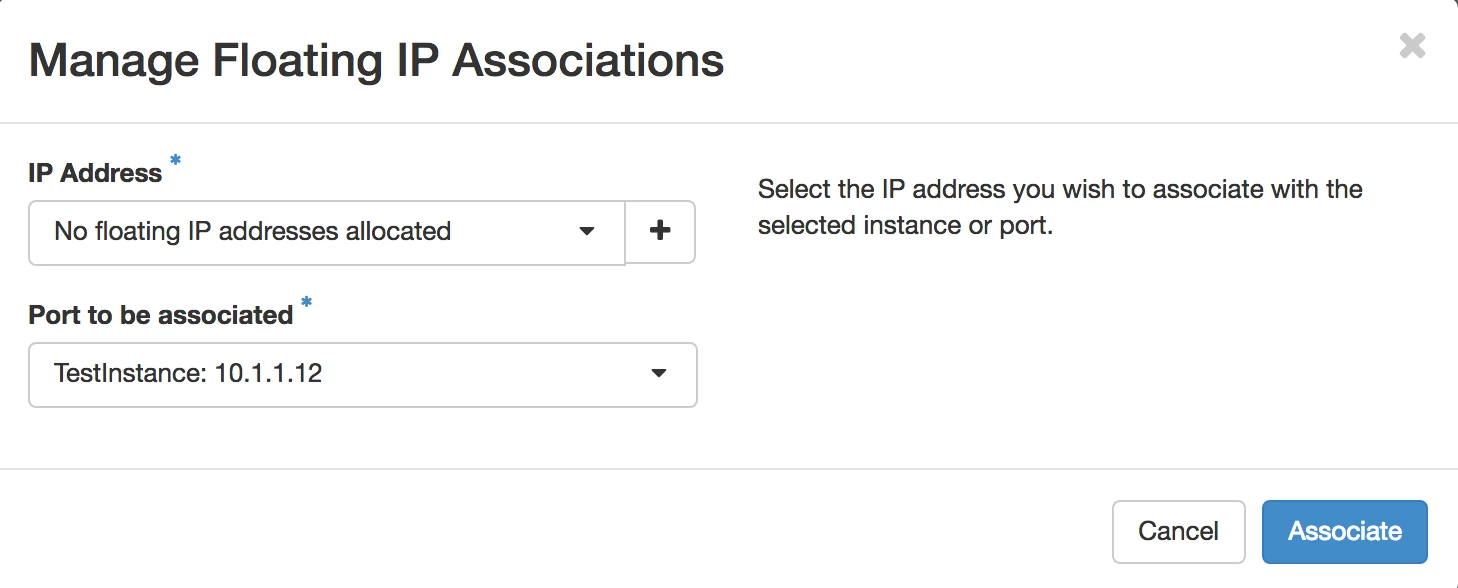
- Assign IP
- If you have previously allocated an IP address, you’ll see it in the IP Address list.
- If you do not, click the
+sign to allocate a new IP address from thePublicpool
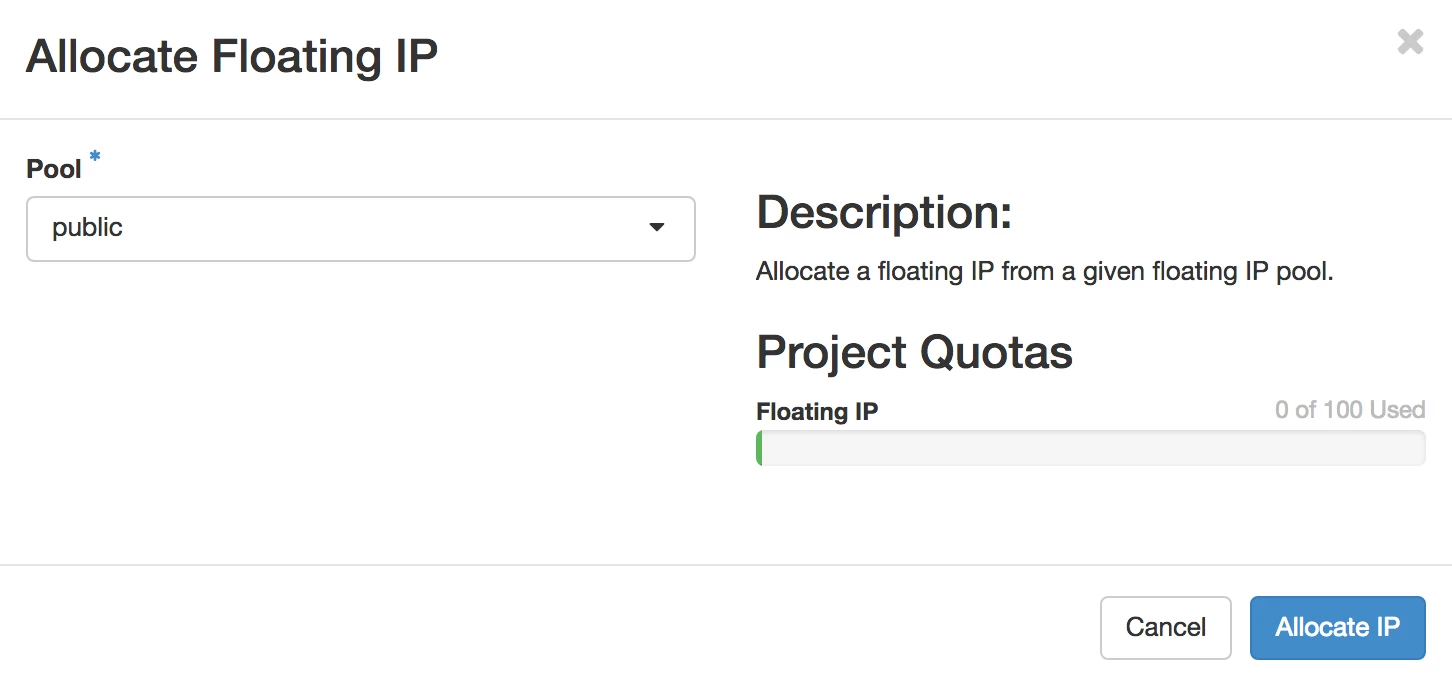
- Assign Pool
- Make sure
Publicis selected underPool - Click
Allocate IP
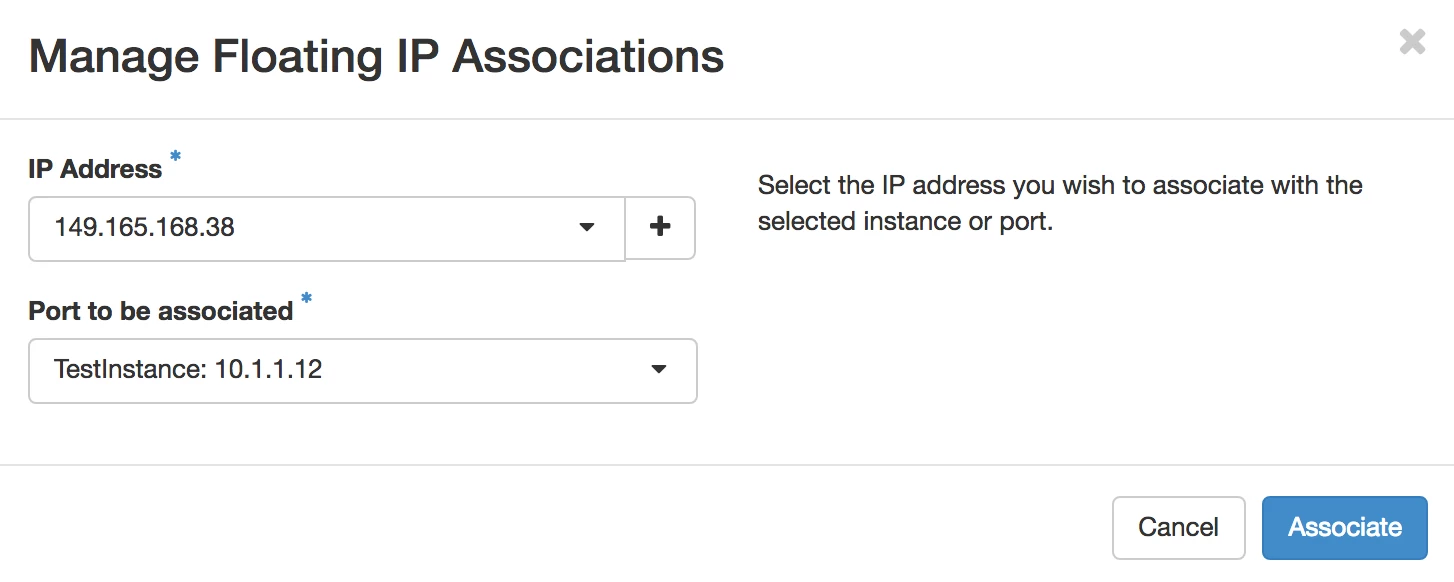
- Choose IP
- Note your new IP address and make sure it’s the one you want to associate with the instance
- Note that the correct instance is selected under
Port to be associated - If all is well, click
Associate
- Test the connection
- Please note that sometimes it takes a few seconds for the association to become active, depending on system load.
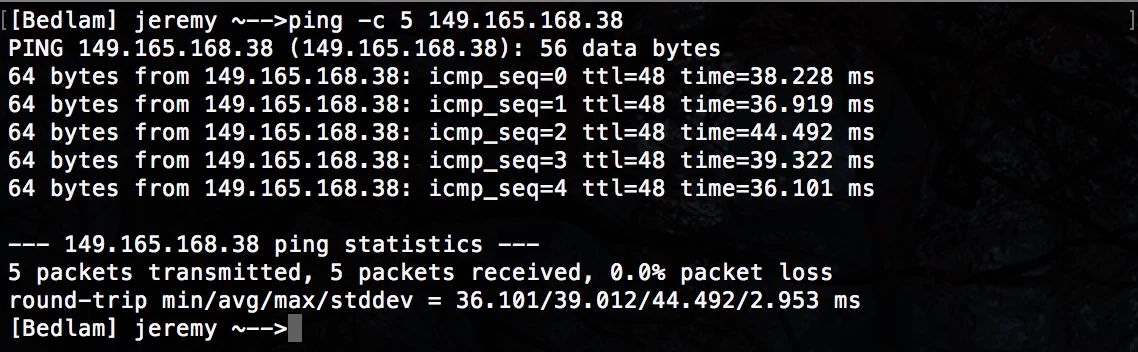
- Though this is normally quick, you can try pinging your new host from a remote machine:
ping -c 5 ip_address
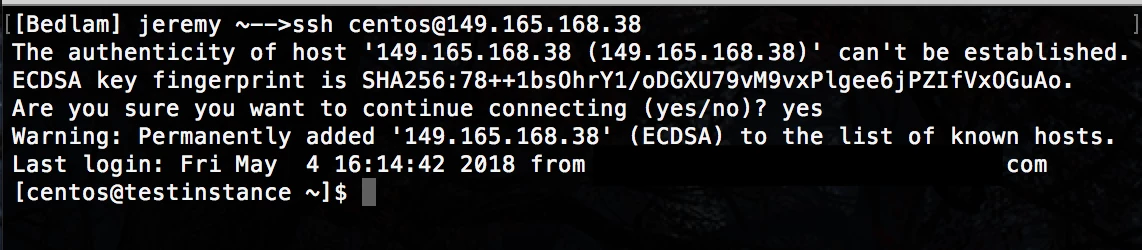
- Try to
sshto your instance
- If you chose a Rocky based instance, your default user is
rocky - If you chose an Ubuntu based instance, your default user is
ubuntu - Access your new host with
sshfrom a remote machine- Example from a terminal-based ssh-client as on Linux or a Mac:
ssh rocky@your_ip_numberorssh ubuntu@your_ip_number
- Example from a terminal-based ssh-client as on Linux or a Mac:
- Note that the first time you connect you’ll get a request to verify that you’re getting a new host key and making sure you want to connect