Snapshots and Images
It can take a lot of time setting up your instances just how you like them and installing all the software you need. If you want to save this work so you don’t have to repeat everything again, or if you want to share with your colleagues, you should take a snapshot of an instance.
Snapshots create an ‘image’ of your instance. This image can then be used as the source when booting a new instance, instead of using one of our featured images. You can also share images publicly or with specific other projects so other people can benefit from your hard work. This is especially useful if you are teaching a class and you don’t want your students to have to devote a bunch of time setting up their instances and installing the software they need to complete their assignments.
Create a Snapshot of an Instance
You can create a snapshot in the same instance action menu where you shelved your instance. This time choose Image.

Name your Image
Choose a name for your image. Then click Create.
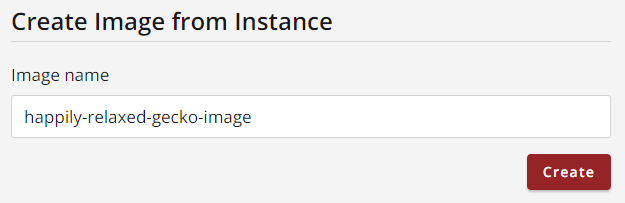
We will just leave the default image name for this tutorial, but we recommend giving the image a unique name so you remember what it’s for.
Create a New Instance From Custom Image
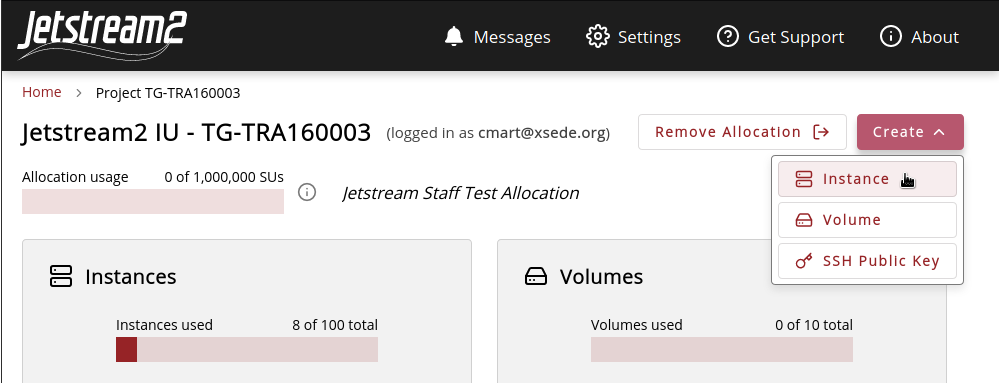
Now that we have an image of our instance, we are able to create a new instance from this image. To begin, start the process of creating a new instance.
Create New Instance
Choose Source
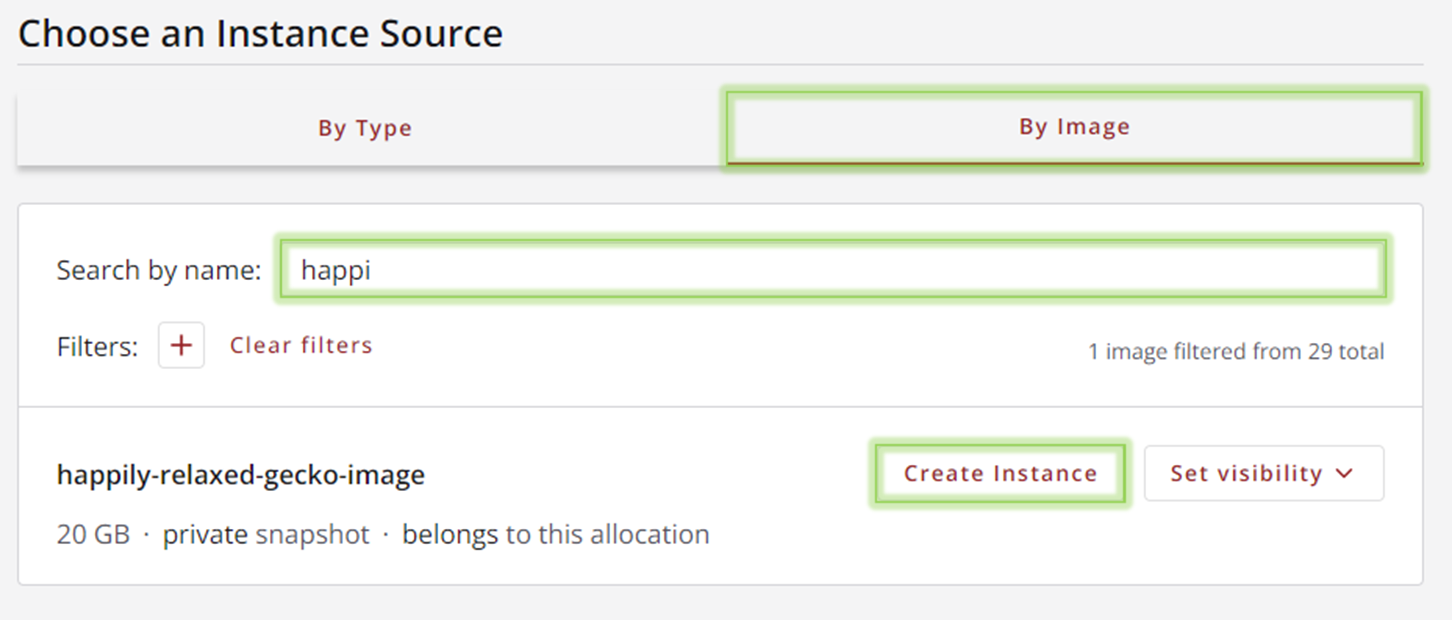
Make sure to change the tab at the top from ‘By Type’ to ‘By Image’. Instead of seeing only our featured images, you will instead see a list of all images available to boot from. This includes any images that have been shared publicly by other researchers.
Then search for the image you created above. It should show up in the list below.
Finally, select ‘Create Instance’. This will load the next page of the instance creation process. Here you should see the name of the image you selected:
Note
If the ‘Create Instance’ option is greyed out that means the image hasn’t finished building yet. Give it a few minutes and refresh your page. If the image is still not ready after several minutes, it’s possible it failed to create. Fortunately in this tutorial we are not losing any real work, so if this happens just create a new instance from our featured Ubuntu 22.04 image and try to create an image from that.
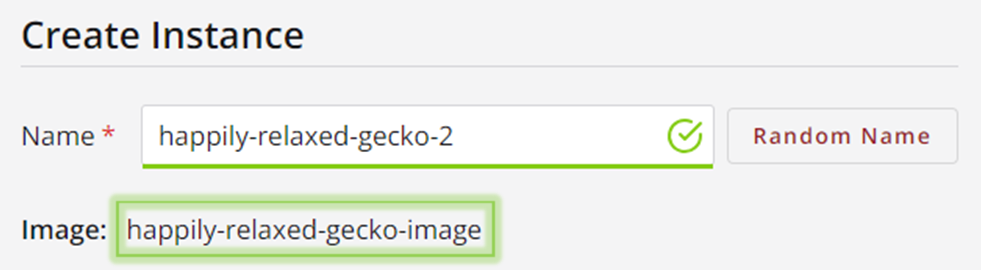
Give Your Instance a Name
You can name your new instance anything you want! Remember to keep it descriptive.
Fill in Remaining Details
If you are unsure of what to select here, go back to Creating your First Instance to refresh your memory.
Select Create
Now that you have given your instance a name and selected all the options you want, go ahead and click to create the instance. Remember that it will take several minutes to build.
Reattach Your Volume
As an exercise for practice, see if you can attach the volume that you created in Volume Management to this new instance.
Once you have it attached, navigate to it’s mount point to verify the data you uploaded to that volume is still there.
Verify Installed Software
Any changes you made to your old instance, before creating a snapshot of it, should be reflected in this new instance. Let’s access the instance to check this.
If you followed along with the Installing your own Software section of the tutorial, then your new instance should already have duf and ncdu installed. Double check this by opening a Web Shell and running those commands again.
Since we have our volume attached now, running duf should display this volume in its list now. Below is a sample of the output from this command. As you can see, our volume, which is mounted at media/volume/my-very-important-data, has a size of 9.7G and is using 20.0K of space. Your disk usage may be different depending on how much data you uploaded.
╭─────────────────────────────────────────────────────────────────────────────────────────────────────────────────────────────────────────────────────────╮
│ 4 local devices                                                                                                                                         │
├──────────────────────────────────────┬────────┬────────┬───────┬───────────────────────────────┬──────┬─────────────────────────────────────────────────┤
│ MOUNTED ON                           │   SIZE │   USED │ AVAIL │              USE%             │ TYPE │ FILESYSTEM                                      │
├──────────────────────────────────────┼────────┼────────┼───────┼───────────────────────────────┼──────┼─────────────────────────────────────────────────┤
│ /                                    │  19.2G │   9.5G │  9.7G │ [#########...........]  49.3% │ ext4 │ /dev/sda1                                       │
│ /boot/efi                            │ 104.3M │   6.0M │ 98.3M │ [#...................]   5.8% │ vfat │ /dev/sda15                                      │
│ /media/volume/my-very-important-data │   9.7G │  20.0K │  9.7G │ [....................]   0.0% │ ext4 │ /dev/sdb                                        │
│ /software                            │   9.8T │ 492.2G │  9.3T │ [....................]   4.9% │ ceph │ 149.165.158.38:6789,149.165.158.22:6789,149.165 │
│                                      │        │        │       │                               │      │ .158.54:6789,149.165.158.70:6789,149.165.158.86 │
│                                      │        │        │       │                               │      │ :6789:/volumes/_nogroup/b7112570-f7cb-4bd2-8c0e │
│                                      │        │        │       │                               │      │ -39b08609b9fd/01aa9d72-69bf-4250-9245-2eaddcdb2 │
│                                      │        │        │       │                               │      │ 51d                                             │
╰──────────────────────────────────────┴────────┴────────┴───────┴───────────────────────────────┴──────┴─────────────────────────────────────────────────╯
Alternatives
Snapshots and images are not the only way of sharing your work between instances, and depending on your workflow may even be overkill. Some alternatives include creating your own shell script or containerizing your setup with something like Docker or Apptainer.
Next
Tutorial Cleanup and Next Steps