Volume Management
What are Volumes?
You can think of a volume as a flash drive. You can store data on it and move it between computers (instances). Also, you can attach multiple volumes to the same instance, but each volume can only attach to one instance at a time.
Creating a Volume
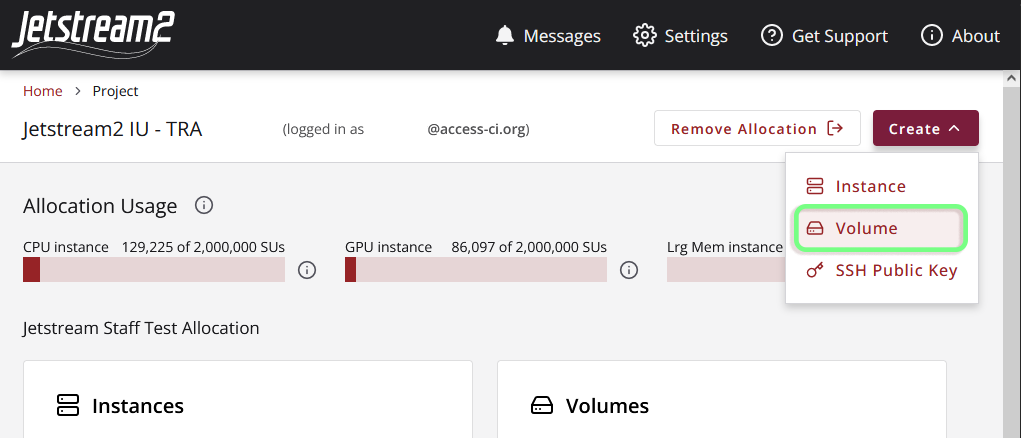
To create a volume, click Create like you did to create an instance, except this time select Volume.
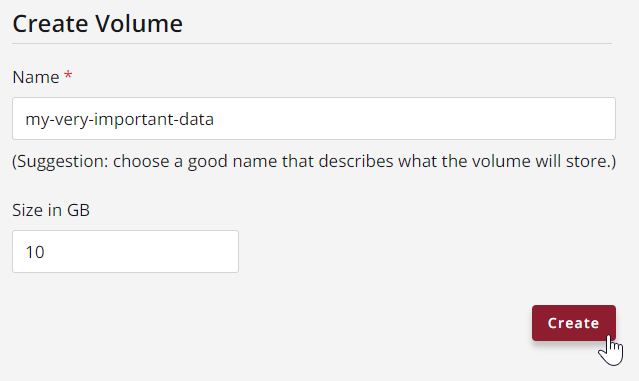
Next, name your volume something descriptive, and choose a size. For this tutorial, the default 10 GB is more than enough. Then click the Create button.
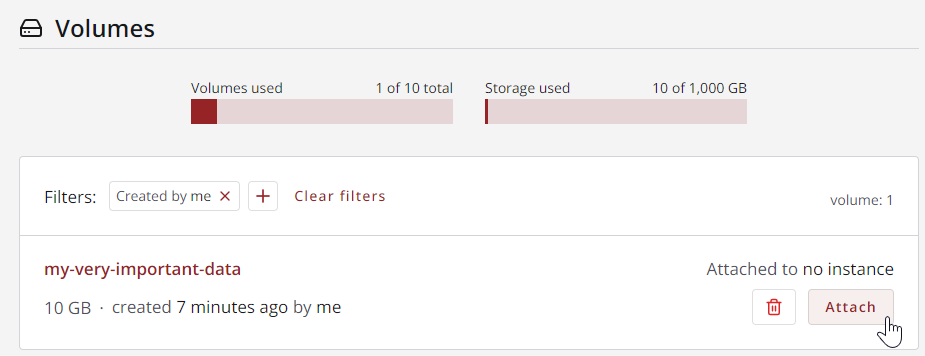
After creating the volume, you will be brought to the Volume Lists page.
Attaching a Volume to an Instance
There are two ways to attach a volume to an instance.
- From the Volume Lists page, which is where you currently are.
-
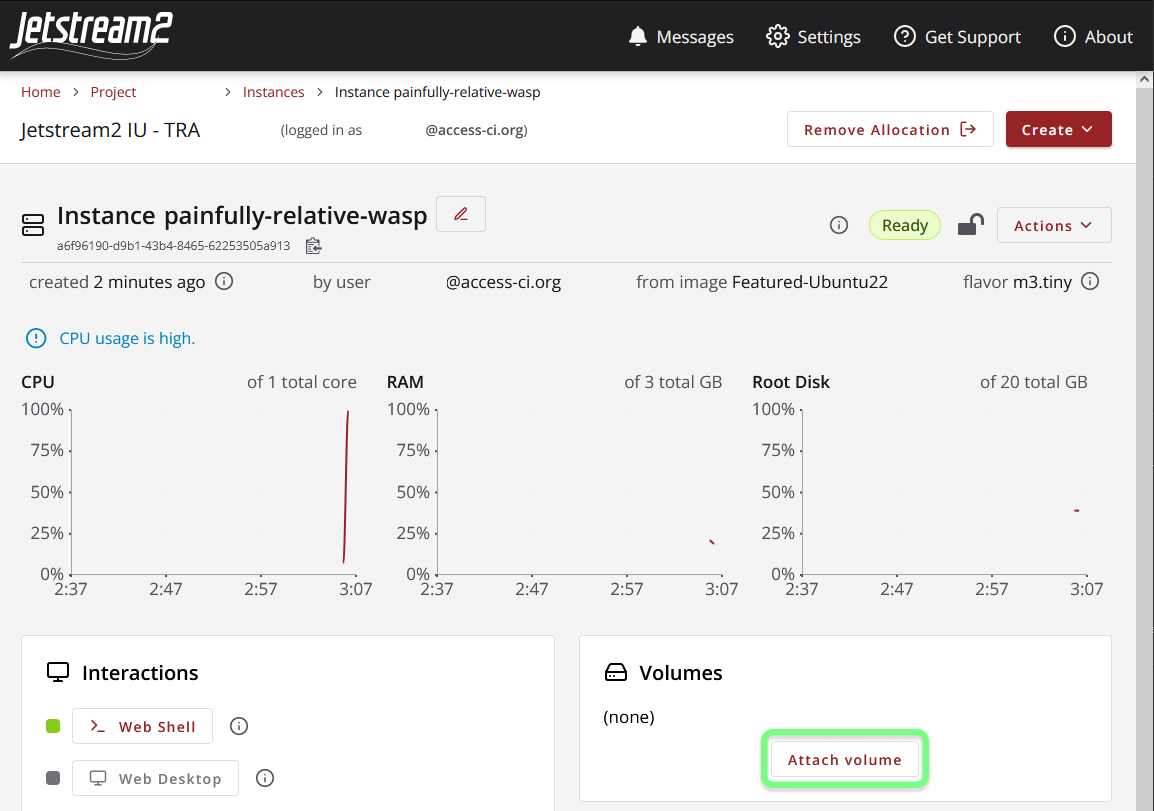
From the Instance Details page.
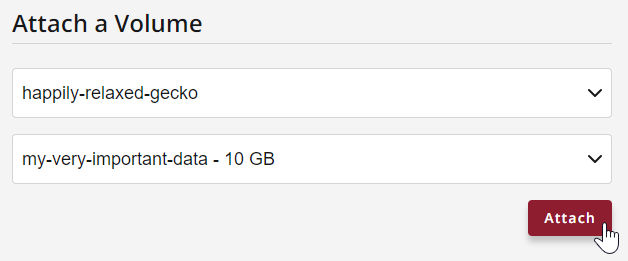
Both of these options will bring you to the volume attachment page, where you will select an instance and the volume you want to attach to it.
Select the instance you created earlier and the volume you just now created, then click Attach.
After clicking attach, a message will pop up telling you the device name given to the volume you just attached, as well as the location you can access the volume in the instance’s filesystem.
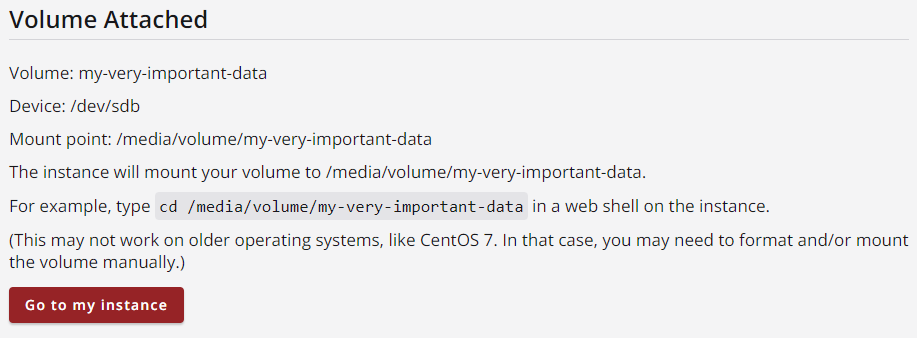
Don’t worry, this information will also be available on the Instance Details page. Click ‘Go to my instance’ to pull up that page now and look for the Volumes card to see the mount point.
Accessing the Volume
Access Volume From Web Shell
First, open the Web Shell. If you are not sure how to do this, review Accessing Your Instance.
Once the web shell is open, simply change directory to the location of the mount point. In our example, this looks like the following, but you will have to alter this to the name of the volume you created.
Note
The most sure-fire way to copy/paste into the Web Shell is to use the menu overlay (Ctrl+Alt+Shift / Ctrl+Cmd+Shift). After copying something from this guide, paste it in the Clipboard section of the Web Shell menu overlay. Then close the overlay and paste it into the terminal. Depending on your browser, there may be shortcuts to paste such as right click or middle mouse, but this is not as reliable.
cd /media/volume/my-very-important-data
That’s all there is to it!
If you are comfortable with using the command line, or are interested in learning some basics, continue with the next section. Otherwise, you can skip to Access Volume From Web Desktop.
Create A File in Web Shell
For demonstration purposes, let’s create some data in this volume.
First, let’s do a simple search to print out everything inside this volume:
find .
.
./lost+found
find: ‘./lost+found’: Permission denied
You’ll notice there is one folder called lost+found here that gives a permission denied error. Don’t worry about this folder. Let’s make our own folder, then create a file inside this folder with the contents of Hello, World.
mkdir my-folder
echo "Hello, World" >> my-folder/hello.txt
Let’s do another search to print out everything inside this volume. This time let’s add sudo to the beginning of the find command. sudo, which stands for ‘super user do’, runs the rest of the line with admin level permissions. This will give the find command permission to search inside the lost+found folder and remove the permission denied message:
sudo find .
.
./lost+found
./my-folder
./my-folder/hello.txt
Access Volume From Web Desktop
First, open the Web Desktop. If you are not sure how to do this, review Accessing Your Instance.
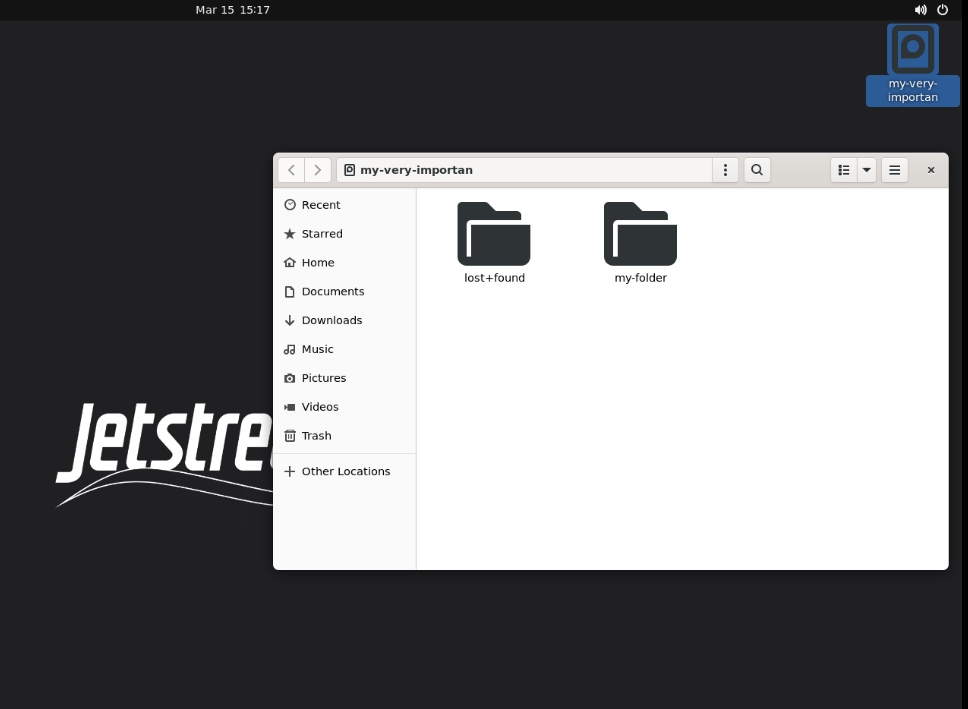
With the volume attached, you should see an icon in the top right of the desktop with the name of your volume that you can double-click to open.
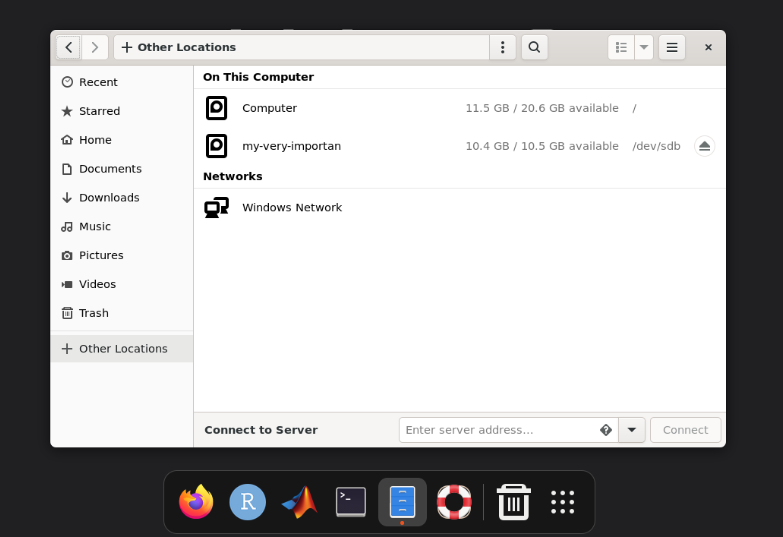
Alternatively, you can open the File Browser, click on ‘Other Locations’ on the left tab, then find your volume in the list.
If you followed the ‘Create a File Using Web Shell’ steps, you should be able to see the folder and file that you created.
Transferring Data
The easiest way to transfer data is to use the Web Shell or Web Desktops’s Menu Overlay. Recall you can open this overlay using Ctrl+Alt+Shift. See Transferring files with web shell and web desktop for detailed instructions.
See if you can transfer some files from your local machine into the volume that you just attached.
If you would like to learn about other data transfer options, see Transferring Files.
Removing the Volume
Before proceeding, make sure to close any Web Shell or Web Desktop tabs you have opened from the previous steps.
To Detach a volume from an instance, you must first navigate to the volume details page. As an exercise, see if you can find this page on your own. It should look like the following.
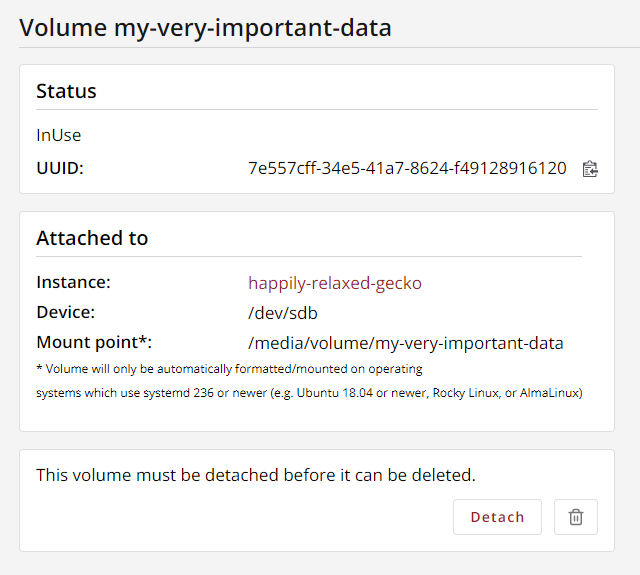
A quick way to get here is to find the Volumes card on the instance details page and click on the arrow next to the volume you want to inspect. Alternatively you can go back to your allocation home page and navigate through the volumes card there.
Detach the Volume
Click the Detach button to detach the volume, then confirm the action. This will take a few seconds and then the volume will be available.
From here, you can attach the volume it to another (or the same) instance or delete the volume. For now, leave the volume alone. We will come back to it later.
Next
Move on to Installing and Running Software to learn about using our software collection and installing your own.